
TT250 Valve Adjustment
This maintenance tutorial addresses TT250 valve adjustment.
You’ll need the following tools for this operation:
The TT250 has a two-valve engine. The intake valve opens to admit the fuel/air mixture, and the exhaust valve opens to expel the exhaust. When the engine is at the top of its compression stroke, we want both valves closed. That’s because we want to compress the fuel air mixture, ignite it, and then allow the resulting high combustion pressures to drive the piston down. If any leakage occurs around any of the valves while this is occurring, the engine will lose power and it could “burn” a valve if the combusting fuel/air mix escapes around the valve while it is still burning.
When engineers design an engine, they want it to do the above, but they have to account for the thermal expansion that occurs as engine temperature increases during normal operation. In order to compensate for this thermal expansion, the engineers design in a gap in the rocker arm/valve train. As the engine warms, this gap approaches zero, and everything works the way it is supposed to.
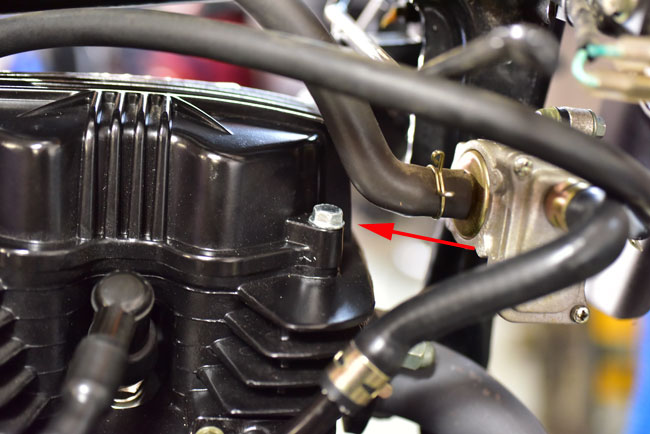
On the TT250, the valve train looks like you see in the photo below (this photo shows the exhaust valve, but both the intake and the exhaust valve have similar valve trains). The valve gap (also referred to as the valve clearance) is what the lower red arrow points to in the photo below.
As the wear described above increases, it has the effect of reducing the valve gap (i.e., the clearance built into the valve train to account for the thermal expansion as the engine warms up). What happens is that as this wear occurs, the valve actually moves higher into the cylinder head and the valve gap decreases. If this wear goes beyond acceptable limits without adjusting the valves, the valve gap grows smaller and smaller. Ultimately, this wear will result in the valve being held off the seat when combustion occurs. This is bad, because when this condition exists, hot burning gases escape around the valve sealing area. Ultimately, these burning gases will destroy the valve and the seat. That’s what happens when we “burn a valve.” It’s also bad because the valve needs to cool, and it is cooled primarily when it is closed against the valve seat. That allows heat to escape from the valve and flow into the cylinder head. If the valve never fully closes, the valve will continue to heat, and the valve stem will expand diametrically so much that it seizes in the valve guide. That’s really bad, too, because when that happens, the valve will stick, the piston will hit it, and you’ve just bought yourself a new engine (or you’ll have to pay for expensive repairs on the current engine).
If the above sounds really bad, relax. We avoid it by adjusting the valves. All we are really doing is keeping the gap in the valve train within an acceptable range over the life of an engine. As the valve and the valve seat wear, we keep everything adjusted so that when the engine is at operating temperature we still form a good seal around the valve seat. That’s the whole idea behind this valve adjustment business.
Different engines use different approaches for adjusting the valves. Your TT250 engine uses the best approach for easy maintenance and high performance: It uses a threaded adjustor shaft with a lock nut to set and lock the valve gap. In the photo above, that’s what the upper two arrows point to. These adjustors are located in the ends of the rocker arms that interface directly with the valve stem.
So, with all that theory behind us, let’s consider what we’re going to do here:
Got that? Okay, here we go….
Most of the work in adjusting the valves is associated with just getting access to the adjustors. The adjustment operation (once we have access) takes only a few minutes.
When you adjust the valves, you have to start with a cold engine. Dead cold. Let your TT250 cool down completely. Don’t cheat on this part. I always let the bike set, without starting the engine, for a day. If it’s even a bit warm from running, your adjustment will be wrong, and all of your work will be for nothing. Let your TT250 cool down completely.
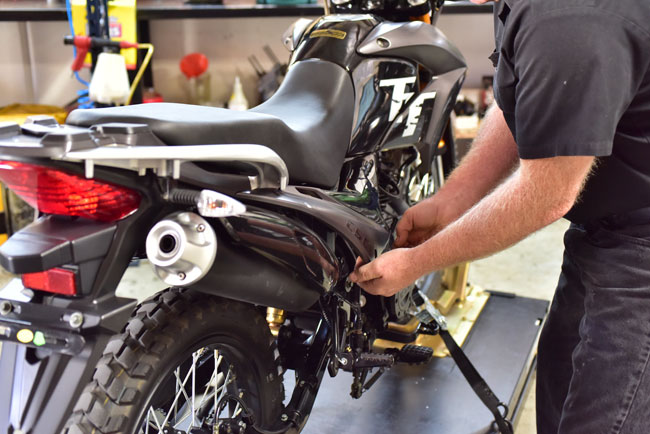
Remove the rear body panels on the left and right side of the motorcycle.
This business of aligning the T mark and it’s scribe with the slot in the threaded area is a little tricky. You should manually rotate the engine so that this T mark and the scribe line are aligned with the slot and both valves are fully closed. Rotate the engine’s crankshaft through the full 360 degrees at least twice to understand what it going on here. On one rotation, you may see that one of the valves is not fully closed. If that’s the case, DO NOT adjust the valves with the engine crankshaft in this position. Rotate the engine another 360 degrees to bring the T mark and scribe line into alignment with the slot in the threaded area. Both valves should be fully closed, which is to say that the rockers should be in the full up position and the valve gap is fully open for the both valves.
Once the engine is at top dead center as described above, we’re ready to make the adjustment. We’ll do so by loosening the 10mm nut (shown by the middle arrow in the photo below) enough to allow us to rotate the threaded adjustor (shown by the upper arrow in the photo below). By doing this, we are changing the valve gap (shown by the lower arrow in the photo below).
Repeat the above process for the other valve.
After I’ve done this, I manually rotate the engine two complete revolutions, align the T mark and the scribe line again, and check the clearance just to make sure I did it correctly.
Assembly is the reverse of disassembly.
Once you’ve reassembled the motorcycle, go out and put some miles on it!
TT250 Valve Adjustment
TT250/SG250 Valve Adjustment






FEELER GAUGE, .002-.003 (.05mm-.08mm)